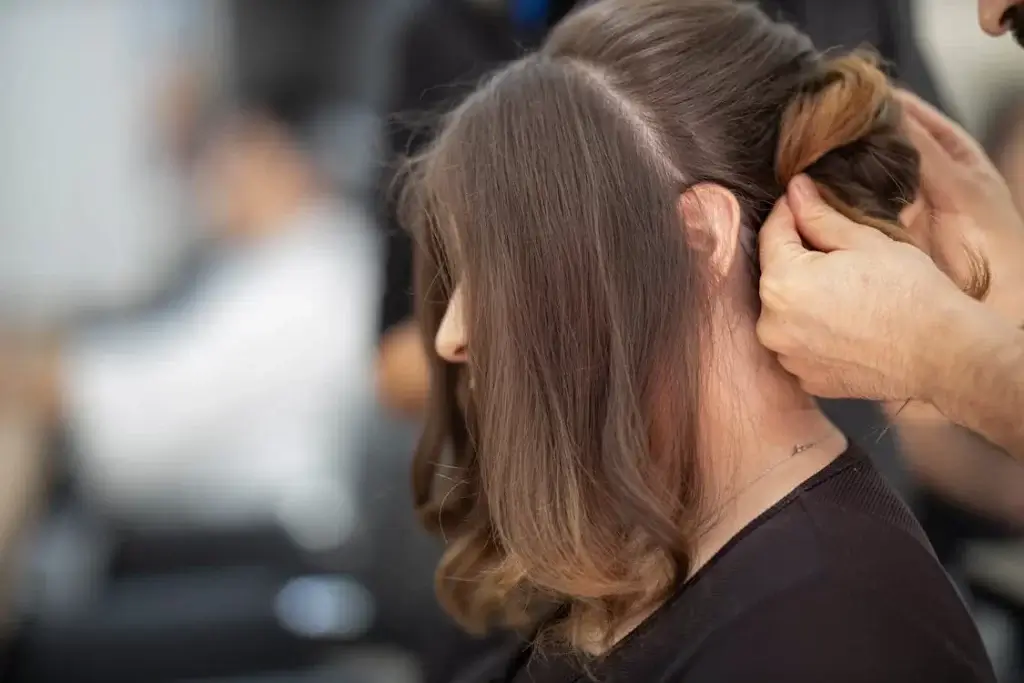
When it comes to weddings, every detail counts, but none perhaps as much as the bridal make up look. It’s the bride’s opportunity to shine on one of the most memorable days of her life. Creating the perfect make up look for a wedding not only enhances the bride’s natural beauty but also ensures she feels confident and radiant throughout the day. Whether you’re a bride-to-be or a make up artist looking for inspiration, these 10 gorgeous tips will guide you in crafting a stunning wedding make up look that stands out and withstands the test of time.
Thank you for reading this post, don't forget to subscribe!Make up Look for wedding
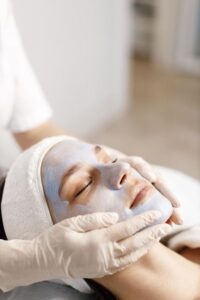
1. Pre-Wedding Skin Care Regimen
The foundation of any great wedding make up look begins with the skin. Radiant, flawless skin is the perfect canvas for make up, and achieving this starts long before the wedding day. A dedicated pre-wedding skin care regimen can make all the difference, ensuring that the bride’s skin is glowing and healthy when it’s time to walk down the aisle.
Understanding Your Skin Type
The first step in establishing a pre-wedding skin care regimen is to understand your skin type. Whether it’s oily, dry, combination, or sensitive, each type requires different products and care. Consultation with a dermatologist or a skilled esthetician can provide personalized insights and recommendations.
Cleansing and Exfoliation
Regular cleansing is critical to remove dirt, oil, and impurities that can clog pores and dull the skin. Incorporating gentle exfoliation 2-3 times a week can help to remove dead skin cells, allowing for a smoother make up application. It’s essential to choose products that are effective yet gentle enough to avoid any skin irritation as the wedding approaches.
Hydration and Nutrition
Hydration is key for a plump, youthful look. Using a daily moisturizer suitable for your skin type helps to keep the skin hydrated. Additionally, incorporating hydrating serums or masks can provide an extra boost of moisture. Nutrition also plays a critical role; drinking plenty of water and maintaining a healthy diet rich in vitamins and antioxidants will nourish the skin from the inside.
Targeted Treatments
For specific skin concerns such as acne, hyperpigmentation, or fine lines, targeted treatments can be very effective. Products with ingredients like retinol, vitamin C, and hyaluronic acid can be incorporated into your routine to address these issues. It’s important to start these treatments several months in advance to allow the skin to adjust and to avoid any adverse reactions close to the wedding day.
Sun Protection
Protecting the skin from sun damage is crucial, especially leading up to the wedding. Daily use of a broad-spectrum SPF can prevent hyperpigmentation and premature aging. Even on cloudy days or during winter, UV radiation can affect skin health, so consistent use is a must.
Consistency is Key
Finally, consistency is the most critical element of any skin care regimen. Starting early and sticking to a daily routine ensures that the skin is at its best. Regular check-ins with a skincare professional can help tweak the regimen as needed and address any issues that arise.
A well-planned pre-wedding skin care regimen sets the stage for stunning wedding make up. By taking care of the skin months in advance, a bride can ensure that her make up look not only looks flawless but also lasts throughout the wedding day. With beautiful skin as a base, any make up look becomes more effective and enchanting.
2. Foundation Matching
Choosing the right foundation is crucial for creating a seamless and natural make up look for your wedding day. The foundation acts not just as a base for other make up, but also evens out the skin tone and enhances the skin’s natural glow. Here are some expert tips on selecting the perfect shade and type of foundation, along with advice on how to test it in natural lighting.
Choosing the Right Shade
Finding the perfect shade of foundation is paramount. The goal is to select a shade that blends flawlessly into your skin without leaving any lines of demarcation.
- Match your jawline: To find the right shade, apply a small amount of foundation along your jawline. The correct shade should disappear into your skin and match your neck’s color, ensuring a natural transition.
- Consider your undertone: Understanding whether your skin has cool, warm, or neutral undertones will help you choose a foundation that complements your natural skin color. Warm undertones look best with peachy or golden shades, cool undertones with pink or red hues, and neutral undertones can lean either way.
Choosing the Right Type of Foundation
The type of foundation you choose can affect how it looks and lasts throughout your wedding day.
- Liquid foundations are versatile and suitable for most skin types. They can offer a range from sheer to full coverage depending on the formula.
- Powder foundations work well for oily skin types and tend to provide a matte finish. They are great for quick touch-ups.
- Cream foundations offer dense coverage and are ideal for photography but are best suited for dry or mature skin types due to their rich formulation.
- Stick foundations are convenient for targeted application and usually offer medium to full coverage, suitable for normal to dry skin.
Testing Foundation in Natural Lighting
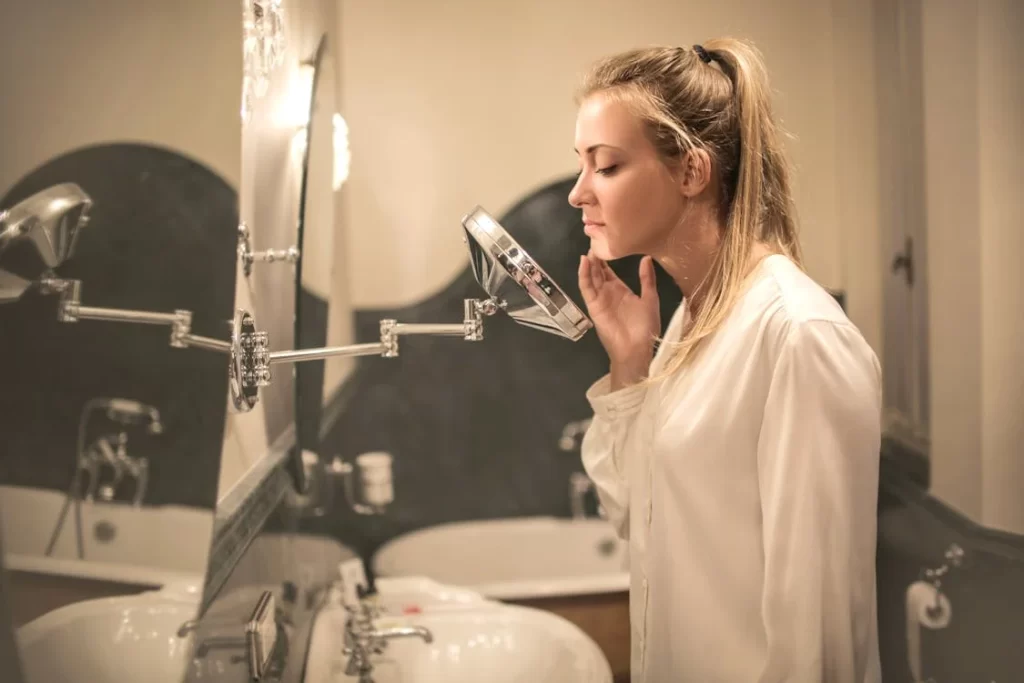
Testing foundation in the lighting conditions in which you will be most often seen is key, especially for a wedding that might take place partly or fully outdoors.
- Step outside: Always step outside with a mirror to see how the foundation looks in natural light. Store lighting can be misleading, often making the foundation look different from how it appears in daylight.
- Check at different times: Since the intensity and quality of natural light change throughout the day, try to check how your foundation looks under various lighting conditions if possible.
- Take a photo: Taking a selfie in natural light can also help you see how the foundation will look in your wedding photos. Look for any signs of oxidation (where the foundation might change color after being exposed to air).
The right foundation can enhance your beauty by creating a smooth and even canvas for the rest of your make up. By carefully selecting the appropriate shade and type, and testing it in natural lighting, you can ensure that your make up look remains flawless and radiant throughout your wedding day, in any light.
3. Highlighting and Contouring
Highlighting and contouring are powerful make up techniques used to define and enhance the natural structure of the face. By playing with light and shadows, these methods can accentuate your best features, creating a more sculpted and radiant appearance for your wedding day. Here’s how to master these techniques and choose the right products for your skin tone.
Techniques to Accentuate Facial Features
- Understanding Face Shapes: Begin by identifying your face shape as this will determine where you should highlight and contour. For instance, contouring under the cheekbones suits most face shapes, while highlighting the brow bone and cheekbones brings forward these areas.
- Application Tools: Use the right tools for application; fluffy brushes are great for a subtle contour and highlight, while denser brushes or sponges provide more precision and a defined finish.
- Contouring Basics:
- Apply a contour shade that is two shades darker than your foundation to areas you want to recede or define, such as the hollows of your cheeks, the sides of your nose, along your jawline, and the edges of your forehead.
- Blend the product well to avoid harsh lines, ensuring a natural transition between your foundation and contour.
- Highlighting Basics:
- Use a highlighter that is one or two shades lighter than your skin tone. Apply it to areas where light naturally hits your face, such as the tops of the cheekbones, down the bridge of the nose, the cupid’s bow, and the center of the forehead.
- Blending is key to a seamless highlight; ensure it melds well with your base and contour for a natural glow.
Choosing the Right Products for Skin Tone
- For Light Skin Tones: Opt for highlighters with a pearlescent, icy silver or champagne sheen. Contours should be cool to neutral browns that aren’t too deep to avoid a muddy look.
- For Medium Skin Tones: Golden or peach highlighters work beautifully, enhancing the natural warmth of the skin. Contour shades should be a warm brown that complements the undertones without looking overly dramatic.
- For Dark Skin Tones: Choose rich gold or bronze highlighters that bring a vibrant warmth to the skin. Deep taupe or espresso contours will provide the necessary depth without ashy results.
- Product Types:
- Powders are great for oily skin and tend to have a matte finish, making them ideal for contouring.
- Creams blend seamlessly into the skin, ideal for dry skin types, and provide a more dewy finish, which is perfect for highlighting.
- Liquids offer buildable coverage and work for all skin types, especially for creating a natural, luminous glow.
Highlighting and contouring can transform your wedding make up look from simple to striking by enhancing your natural features and giving your face a more structured appearance. Remember, the key to perfect highlighting and contouring is choosing the right shades and blending them seamlessly. With these techniques, you’ll look effortlessly radiant on your big day.
4. Eye Make up Look for Weddings
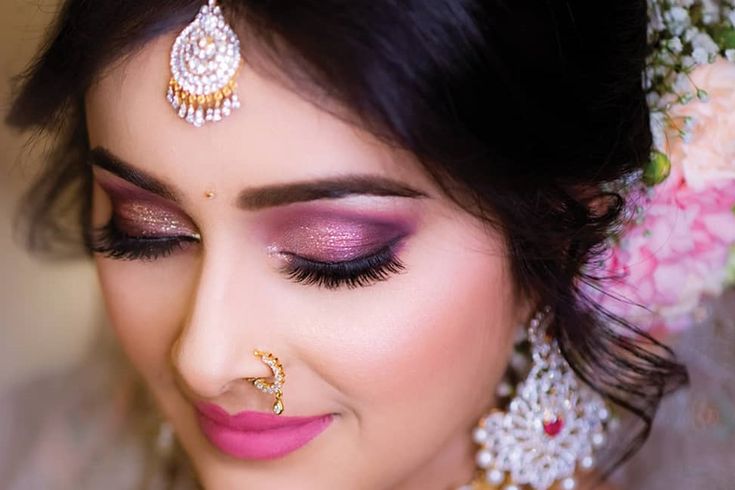
The eyes are often described as the windows to the soul, making eye make up look a critical element in any bridal look. Perfecting your eye make up look not only enhances your natural beauty but also ensures that your eyes stand out in photographs. From choosing the right color palettes to applying products that last through tears and laughter, here’s how to achieve the perfect eye make up look for your wedding day.
Choosing Color Palettes Suitable for Weddings
- Neutral Tones: Neutral shades such as beiges, browns, and soft pinks are timeless and elegant, making them perfect for a classic bridal look. These colors work well with all skin tones and eye colors and create a soft, romantic effect.
- Soft Metallics: Gold, rose gold, and champagne add a touch of glamour and are ideal for weddings. They can be used as the main lid color or as a highlighter in the inner corners of the eyes or the center of the eyelid to catch the light beautifully.
- Smokey Eyes: For a more dramatic look, a soft smokey eye can be stunning. Opt for grays or browns instead of black for a softer approach, blending them well to avoid harsh lines.
- Pop of Color: Depending on the theme of the wedding or the colors of the bridal party, adding a subtle pop of color like lavender, light blue, or even a soft green can personalize your look while keeping it bridal.
Techniques for Long-Lasting Eyeshadow, Eyeliner, and Mascara
- Prime the Eyelids: Start with an eyeshadow primer to create a smooth canvas. This will help the shadow adhere better and prevent creasing throughout the day. Let the primer set for a few minutes before applying your eyeshadow.
- Use Quality Eyeshadows: Invest in high-pigment, high-quality eyeshadows. These formulations provide better coverage and longer wear. Use a setting spray on your brush before dipping into the shadow for even more staying power.
- Layering: Build the color up in layers, starting with a light application and adding as needed. This technique ensures that the eyeshadow binds better to the lid and stays put longer.
- Waterproof Formulas: Choose waterproof eyeliners and mascaras to avoid smudging or running, especially important for emotional occasions like weddings. Gel liners are excellent for their smudge-proof qualities and ease of application.
- Setting Spray: Once your eye make up look is complete, do not forget to mist your face with a setting spray. This step locks the make up look in place and helps to merge all the layers of products for a more cohesive look.
- Powder Trick: For extra assurance, lightly dust translucent powder over your eyeliner. This will help set the makeup and extend its wear time. Be careful to use only a tiny amount to avoid a cakey appearance.
Creating the perfect eye make up look for your wedding involves choosing the right colors and employing techniques that ensure longevity. By following these tips, you can be confident that your eye make up look will flawless and enhance your natural beauty throughout your special day. Whether you opt for a natural, glamorous, or slightly bold eye make up look style, the key is to practice beforehand to ensure that everything looks perfect on the big day.
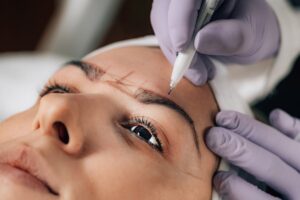
5. Eyebrow Shaping and Filling
Eyebrows play a crucial role in framing the face and enhancing facial expressions, making them an essential aspect of any bridal make up look. Well-groomed and properly shaped eyebrows can lift the face and give a polished appearance to your overall make up look. Here’s why professional eyebrow shaping is important and how to fill in your eyebrows to maintain that perfect look throughout your wedding day.
Importance of Professionally Shaped Eyebrows
- Customized Shaping: A professional brow stylist can assess your face shape and natural brow line to create the most flattering shape for your eyebrows. This tailored approach helps enhance your natural features and ensures your brows complement the rest of your make up look.
- Symmetry and Balance: Eyebrows are notorious for being uneven, but a professional can correct asymmetrical brows, creating a more balanced look. This symmetry is vital for photographs and can significantly impact your bridal appearance.
- Foundation for Filling: Properly shaped eyebrows provide a good template for filling them in. They ensure that any additional color or products added later blend seamlessly and look natural.
Products and Techniques for Filling Eyebrows
- Choosing the Right Product:
- Pencils: Ideal for creating precise, hair-like strokes, especially in sparser areas. Pencils are great for defining the shape of the brows.
- Powders: Best for a softer, more natural look. Powders can help fill in any gaps without looking too harsh.
- Gels: Clear or tinted brow gels are perfect for setting the hairs in place and adding a slight tint. They can make the eyebrows look fuller and more polished.
- Pomades: These are excellent for a more dramatic, defined look. They are highly pigmented and long-lasting, suitable for brides looking for standout brows.
- Techniques for Filling in Eyebrows:
- Follow the Natural Arch: Use light, feathery strokes to fill in the brows according to their natural shape. Focus on sparse areas, but be careful not to overfill to maintain a natural appearance.
- Outline and Fill: For a more defined look, lightly outline the bottom and top edges of your brows and then fill them in using short, light strokes.
- Blend, Blend, Blend: Use a spoolie brush to blend the product through your brows. This blending helps soften any harsh lines and distributes the product evenly, mimicking natural brow hairs.
- Long-Lasting Tips:
- Primer: Just like your eyelids, applying a small amount of primer on your brows can help make the product last longer.
- Setting Spray: A quick spritz of setting spray can help lock the brow product in place, ensuring it doesn’t smudge or fade during the day.
Professionally shaped eyebrows not only enhance your bridal beauty but also provide the perfect foundation for any additional filling or detailing. By choosing the right products and applying them with care, you can ensure your eyebrows look flawless and remain consistent throughout your wedding celebrations. Remember, your eyebrows can make a significant impact on your overall bridal look, so give them the attention they deserve in your wedding make up look routine.
6. Choosing the Right Lip Color
Selecting the perfect lip color for your wedding day is a crucial part of your overall make up look. The right shade can enhance your features, complement your bridal attire, and ensure you look stunning in photos. Here are some tips on choosing a lip color that harmonizes with your make up look and some long-lasting lipstick options to keep your lips looking flawless throughout your special day.
Tips on Selecting a Shade that Complements the Overall Make up Look
- Consider Your Skin Tone:
- Fair Skin: Light pinks, peachy nudes, and soft corals work beautifully.
- Medium Skin: Rose, mauve, and berry tones are flattering.
- Olive Skin: Warm reds, deep pinks, and peachy nudes enhance olive complexions.
- Dark Skin: Rich berries, deep reds, and warm browns are stunning choices.
- Match Your Makeup Style:
- Natural Look: If your overall make up look is soft and natural, opt for nude or soft pink shades that enhance without overpowering.
- Glamorous Look: For a more dramatic make up look style, choose bold colors like classic reds or deep plums to make a statement.
- Vintage Look: Pair vintage-inspired make up look with classic shades such as matte red or a soft rose.
- Coordinate with Your Wedding Theme and Attire:
- Ensure your lip color complements your wedding dress and overall theme. For example, a beach wedding might call for lighter, more natural shades, while a formal evening wedding might allow for bolder, more glamorous colors.
- Test and Adjust:
- Try different shades during your make up look trials to see which one feels the most comfortable and looks the best in various lighting conditions. Consider how the lip color photographs as well.
Long-Lasting Lipstick Options for the Big Day
- Matte Lipsticks:
- Matte formulas are known for their staying power and are less likely to smudge or transfer. They provide a chic, modern look and can be found in a variety of shades to suit any bride’s preference.
- Liquid Lipsticks:
- Liquid lipsticks often have long-lasting formulas that dry down to a matte finish. They are ideal for creating a defined, bold look that lasts throughout the day.
- Lip Stains:
- Lip stains offer a natural, flushed look and are perfect for brides who prefer a lighter feel on their lips. They are usually very long-lasting and can withstand eating and drinking.
- Lip Liners:
- Using a lip liner in a matching shade can help prevent feathering and increase the longevity of your lip color. Fill in your entire lip with the liner before applying lipstick for added durability.
- Setting Techniques:
- After applying your lipstick, blot your lips with a tissue, apply a thin layer of translucent powder over the tissue, and then reapply the lipstick. This technique helps set the lipstick and extends its wear time.
Choosing the right lip color is essential for achieving a cohesive and polished bridal make up look. By considering your skin tone, overall make up look style, and wedding theme, you can select a shade that enhances your natural beauty. Opt for long-lasting formulas and use setting techniques to ensure your lip color stays vibrant throughout your wedding day. With the right preparation, your lips will look picture-perfect from the first kiss to the last dance.
7. Blush Application
Blush is a pivotal element of bridal make up look, adding a healthy flush of color that enhances the bride’s glow. The right blush and application technique can illuminate the face, define cheekbones, and ensure a radiant look throughout the wedding day. Understanding how to select and apply blush based on your face shape, and deciding between cream and powder formulas, are key to achieving the perfect look.
Choosing and Applying Blush Based on Face Shape
- Oval Face:
- Application: Apply blush on the cheekbones, blending upwards towards the temples to enhance the natural contours of the face.
- Best Blush: Any color works well, but a soft rose or peach adds a natural-looking warmth.
- Round Face:
- Application: Apply blush slightly above the apples of the cheeks and blend outwards and slightly upwards. This technique helps elongate your face, giving it a more sculpted appearance.
- Best Blush: Muted mauve or berry shades can provide depth and subtle definition.
- Square Face:
- Application: Apply blush on the apples of the cheeks and blend towards the ears. This softens the angles of the face and draws attention centrally.
- Best Blush: Warm corals or soft peach shades can soften strong features and add warmth.
- Heart-Shaped Face:
- Application: Apply blush below the apples of the cheeks and blend outward towards the hairline. This technique balances the wider forehead with the narrower chin.
- Best Blush: Soft pinks or creams work well to enhance this face shape delicately.
- Long Face:
- Application: Apply blush directly to the apples of the cheeks and blend horizontally towards the ears. This helps to cut the length of the face and add a perception of width.
- Best Blush: Vibrant pinks or rosy tones can add a lively pop of color, making features more pronounced.
Cream vs. Powder Blush for Wedding Events
- Cream Blush:
- Advantages: Cream blushes are ideal for dry or mature skin types as they provide a dewy finish that hydrates while adding color. They blend seamlessly into the skin for a natural look.
- Application Tip: Use your fingers or a damp beauty sponge to apply cream blush. The warmth of your fingers helps the product melt into the skin, while a sponge offers a more airbrushed finish.
- Setting: It’s advisable to set cream blush with a light dusting of translucent powder to ensure it stays put throughout the event.
- Powder Blush:
- Advantages: Powder blush is great for oily or combination skin types. It offers a matte finish and tends to last longer than cream blush, especially in hot or humid conditions.
- Application Tip: Use a fluffy blush brush for a soft, diffused look. Tap off excess powder before applying to avoid over-application.
- Layering: For added longevity, layer a powder blush over a cream blush. This technique locks in color and ensures the blush lasts all day.
Selecting the right blush and mastering its application can significantly enhance a bridal make up look. By considering your face shape and choosing between cream or powder formulations based on your skin type and the event’s demands, you can achieve a flawless and enduring flush that complements your wedding day beauty.
8. Setting the Make up
Ensuring your make up look flawless all day during your wedding is crucial. Setting your make up look properly not only enhances its longevity but also maintains the vibrancy of the colors and the smoothness of the foundation. Here’s why using setting spray or powder is essential and some recommendations tailored to different skin types.
Importance of Setting Spray or Powder
Setting sprays and powders play a pivotal role in wedding makeup by:
- Locking in Makeup: They help lock everything in place, preventing make up look from smudging, creasing, or fading throughout the event.
- Reducing Shine: Particularly for oily skin types, setting products help control excess oil and minimize shine.
- Creating a Flawless Finish: These products blend the layers of make up together, reducing any cakey appearance and creating a smooth, uniform look.
- Enhancing Comfort: Good setting products can make wearing make up look more comfortable, as they often provide a lightweight, breathable layer that doesn’t feel heavy or sticky.
Choosing the Right Setting Product
- For Oily Skin:
- Powder: Translucent setting powders are excellent for oily skin as they absorb excess oil and reduce shine. Look for mineral-based formulas that provide a matte finish without clogging pores.
- Spray: Choose a mattifying setting spray that contains ingredients like silica or kaolin clay to help control oil throughout the day.
- For Dry Skin:
- Powder: If you have dry skin, be cautious with powder as it can accentuate dry patches. Opt for a hydrating formula that contains ingredients like hyaluronic acid or glycerin.
- Spray: A hydrating setting spray will be your best choice. Look for products that contain soothing and moisturizing ingredients like aloe vera, cucumber, or Vitamin E, which help to set your make up look while keeping your skin hydrated.
- For Combination Skin:
- Powder: Use a lightweight, translucent powder on areas that tend to get oily, such as the T-zone, and skip areas that are drier.
- Spray: A setting spray designed for all skin types, or one that balances mattifying and hydrating properties, works well for combination skin.
- For Sensitive Skin:
- Powder: Mineral powders are ideal as they are less likely to irritate sensitive skin. Avoid powders with fragrance or parabens.
- Spray: Look for hypoallergenic setting sprays that are free from alcohol and fragrance to minimize the risk of skin irritation.
Application Tips
- Powder: Apply with a large, fluffy brush to distribute the product evenly. Focus on areas that tend to become oily.
- Spray: Hold the bottle several inches away from your face and spritz in an “X” and “T” motion to cover all areas evenly. Allow it to dry naturally.
Setting your make up look is an essential step in your wedding day beauty routine. Choosing the right setting powder or spray according to your skin type can make a significant difference in how your make up look holds up throughout the celebrations. By securing your look in place, you can focus more on enjoying your big day and less on touch-ups.
9. Make up Trials
A make up look trial before your wedding day is as crucial as fitting your wedding dress. It ensures that your make up look perfect and that you feel confident and radiant. Here’s why you should consider scheduling a make up look trial and what to look for during these sessions.
The Necessity of Having a Makeup Trial Before the Wedding
- Visualize the Final Look: A trial allows you to see exactly how your make up look will on your wedding day. It ensures that your vision aligns with your makeup artist’s interpretation and adjustments can be made beforehand.
- Test Durability: It’s essential to know how your makeup will hold up throughout a long, eventful day. A trial can reveal how different products react with your skin and last under various conditions, such as exposure to light, heat, or even tears.
- Skin Sensitivities: Testing products during a trial can alert you to any potential skin sensitivities or allergies. It’s better to discover these well in advance rather than on your wedding day.
- Perfect the Details: It’s an opportunity to experiment with different looks and refine one that best suits your style, dress, and wedding theme. Small tweaks can significantly enhance your overall appearance.
- Build a Relationship: A trial helps in building a rapport with your makeup artist, making it easier to communicate your preferences and concerns. Trust and understanding with your artist will ensure smoother execution on the actual day.
What to Look for During a Trial Session
- Overall Comfort: Notice how the make up look feels on your skin. It should feel comfortable and lightweight rather than heavy or irritating. You want to feel naturally beautiful, not masked.
- Color Accuracy: Ensure that the colors used complement your skin tone, outfit, and wedding decor. Pay special attention to the foundation and concealer shades, as they should match perfectly to avoid any visible lines or mismatched tones.
- Technique and Quality: Observe the techniques used by the makeup artist. Are they blending well? Are the lines (especially of eyeliners and lip liners) crisp and clean? The quality of application will impact the longevity and appearance of your makeup.
- Balance and Symmetry: Your features should look balanced and symmetrical. Ask for feedback from a trusted friend or family member who can give you a second opinion.
- Photogenic Qualities: Take plenty of photos in different lighting conditions to see how your make up look in photos. Check if it looks too shiny, flat, or just perfect.
- Longevity: Wear the make up look for as long as possible to see how well it holds up. Does it need frequent touch-ups? How does it react to different activities and temperatures?
Makeup trials are a critical step in ensuring that your wedding day make up look is flawless and durable. They offer a preview of your bridal look and provide an opportunity to make necessary adjustments. By paying attention to how the make up look, feels, and lasts during the trial, you can be confident that your wedding day beauty will be everything you’ve dreamed of.
10. Emergency Make up Kit
Even with the best preparations, minor make up look mishaps can occur during a wedding day. An emergency make up look kit is an essential toolkit that can help you address any beauty concerns quickly and discreetly. Here’s what to include in your kit and some tips on how to fix common make up look issues efficiently.
Essentials for a Touch-Up Kit to Keep on Hand During the Wedding
- Blotting Papers: Essential for controlling shine without layering more powder, which can make your make up look cakey.
- Powder Compact: A small compact with a mirror is perfect for quick touch-ups to mattify and smooth out the complexion if needed.
- Lipstick or Lip Gloss: Since lips often fade the fastest, having your lip color on hand for quick reapplication is crucial.
- Concealer: For any unexpected blemishes or discoloration that might crop up during the day.
- Mascara: A mini waterproof mascara can be used to touch up lashes or refresh eye make up look if it starts to look tired.
- Makeup Sponges or a Small Makeup Brush: Useful for blending out any creases or make up look that has shifted, especially around the eye area.
- Setting Spray: A travel-sized setting spray can help refresh your make up look and keep it looking vibrant.
- Eyelash Glue: If you are wearing false lashes, a small tube of eyelash glue can fix any corners that might lift.
- Cotton Swabs and Makeup Remover: Perfect for correcting smudges or eyeliner/mascara mishaps without disturbing the rest of your makeup.
- Hair Pins and Hair Spray: For quick hair fixes or to tame any flyaways.
How to Quickly Fix Common Makeup Issues
- Oily Skin: Use blotting papers to absorb excess oil and then lightly dab on a compact powder to matte out shine.
- Smudged Eyeliner: Use a cotton swab dipped in make up look remove to clean up any smudges. Reapply eyeliner if necessary.
- Faded Lipstick: Reapply your lipstick or gloss. For longer-lasting results, fill in your lips with a lip liner before applying the lipstick.
- Creased Eyeshadow: Lightly tap a make up look sponge or your finger over the creased area to smooth it out. Use a small amount of primer and then reapply the eyeshadow if necessary.
- Running Mascara or Eyeliner: Clean any smudges with a cotton swab and a tiny bit of makeup remover, then reapply a waterproof version if available.
- Blush Fade: Use a dab of cream blush to refresh your color. Cream products blend easily over existing make up look without disrupting it.
- False Eyelash Lifting: Apply a small amount of eyelash glue to the lifted area using a cotton swab or the glue’s applicator, then press down to secure.
Preparing an emergency makeup kit allows you to handle any makeup emergencies that might arise on your wedding day. Keeping these essentials on hand will ensure that your makeup remains pristine from start to finish, letting you focus on enjoying your special day with confidence.
Crafting the perfect make up look for your wedding is an exciting yet meticulous process that plays a pivotal role in your overall bridal appearance. From the initial stages of choosing the right foundation to the final touches of setting your makeup, each step requires careful consideration and precision. By following the comprehensive guidelines provided—from selecting the best color palette for your eyes to ensuring your lipstick remains vibrant—you can achieve a flawless and enduring beauty look that not only enhances your natural features but also aligns with your personal style and wedding theme.
An effective make up look trial is essential, as it allows you to preview and refine your look well before the big day, ensuring there are no surprises. Additionally, having an emergency makeup kit is crucial; it empowers you to handle any unexpected beauty mishaps, keeping your make up look impeccable from the ceremony to the last dance.
Ultimately, the key to stunning wedding day makeup lies in preparation and personalization. By understanding and implementing these tailored tips and techniques, you can look and feel your best, capturing the essence of your joy and beauty on one of the most memorable days of your life. Remember, your wedding make up look should be a reflection of you—timeless, beautiful, and radiant.